ColourDesigner · Masking
How do I prepare my own Pictures for the ColourDesigner?It is not that difficult to prepare your own pictures for the ColourDesigner. All that you need is an image editing software which is able to mask and create png-files for example Corel PhotoPaint, PicturePublisher, PaintShopPro, ...
Fundamental Idea "Masks"
Our program needs not only the bitmap file which is to be colorized but also the colour areas which belong together for example the area where the window frame is located in the picture. An affinity colour calculation would not work reasonably because the facade of a house for example does not only have a consistent colour in an image but also lights, shadows and structure. Due to that fact you have to tell the ColourDesigner which areas belong together when it is colorizing the image.
This works via another file of the same size which only includes the image areas, the so called „masks“. A mask contains for example the facade area, another the window frames.
How do I prepare a Picture?
The picture which is to be colorized has to exist as a png file in the subdirectory "Images/Pictures".
The image file which contains the masks has to exist as a png file in the subdirectory „Images/Masks“. The picture size of the Mask file has to possess the exact same size as the image file. The therein contained mask areas have to be coloured with uniform fillings – it is not important which except for black and white. The file name is the file name of the image file with the addition of "_mask".
The program colorizes each area with the same masking colour in the selected colour.
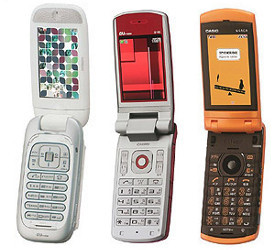
Mobiltelefone.png
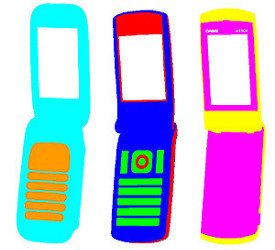
Mobiltelefone_mask.png
Optional: Text File containing the Masks Names
Masks can be managed in the program via names in the selection list. The deposited masks names will be displayed in the program as a masks selection list. The textfile containing the masks names belongs with the addition "_masks.txt" into the folder "Images/Masks".
The textfile contains information about the colour of the respective mask and also the name in German and English, seperated by a vertical dash. The first line contains abbreviations of the usable languages (Deutsch=ge, en= English) for the names of the masks.
Typical contents of a masks text file:
ge|en
000 255 255 Mobiltelefon 1|Cellphone 1
255 155 000 Mobiltelefon 1 Bedienfeld|Cellphone 1 buttons
000 000 255 Mobiltelefon 2|Cellphone 2
000 255 000 Mobiltelefon 2 Bedienfeld|Cellphone 2 buttons
255 000 000 Mobiltelefon 2 Display Rahmen|Cellphone 2 display frame
255 255 000 Mobiltelefon 3 oben|Cellphone 3 top
255 000 255 Mobiltelefon 3 unten|Cellphone 3 down
The top right picture contains seven masks.
Attention: The masks files should not contain german mutated vowels, ß or other additional characters (é, ñ, ...) because those are displayed wrongly in the masks list. If the masks names contain additional characters the text file has to be saved in the UTF8 format and then the first three characters in the file have to be deleted.
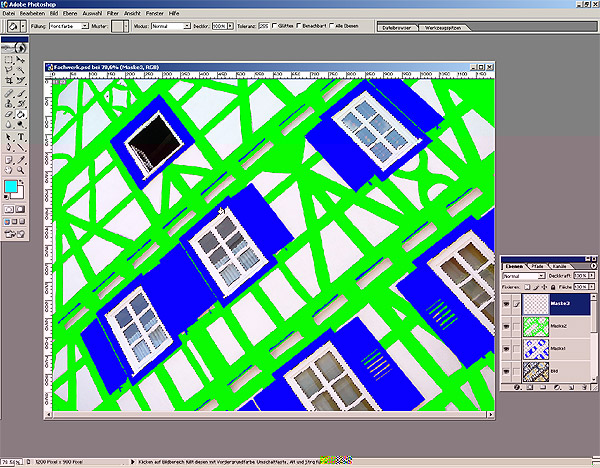
This Way it works in Photoshop and other Image Editing Software
Connected image areas can be marked with the selection tool and then painted in any colour. Image editing programs offer different tools to select objects for example lasso, selection, polygon, wand. Please read for this the chapter in the helpfile of the respective program.
Don’t work directly on the picture itself but on an above lying transparent level so that you can check at all times if the selection fits. It would be reasonable to keep the file with the levels in case that you notice while working in the ColourDesigner that an area is not completely masked. This can be correct then in the file with the levels.
Each mask has to consist of a different colour. Two masks with the same colour will be interpreted as one area. A mask has to be self-contained, that means that all therein contained pixel have to feature the same RGB values.
After the creation of the masks you have to save the masks file and the image file as png-files in the directories „Images/Masks“ and „Images/Pictures“ respectively. They have to possess the same name but the masks file gets the addition „_mask.png“.
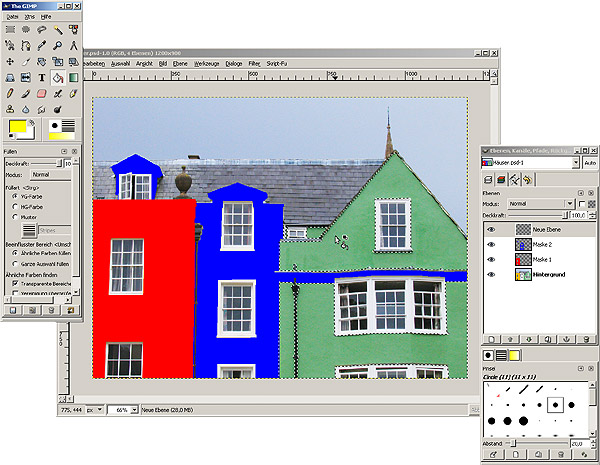
This way it works in GIMP
GIMP is a free of charge image editing software which we can recommend at this point. You can download the current version here.
At first you have to save (File > Save as...) the picture you want to colorize in the ColourDesigner as an png-file in the subdirectory "Images/Pictures".
Then you can start with masking it. GIMP includes several selection tools which you can use to create the masks.
| Command | Description | Usability |
|---|---|---|
| Freehand Selection | Circle the edges of the object with the cursor while pressing the left mouse key. Don’t stop until you reach the starting point again otherwise the selction will be closed. | It is not recommendable except you have a graph tablet at hand. The work with the mouse is most of the time too inaccurate. |
| Select Continuous Area | Click with the cursor into the colour area you want to select. This colour will then be marked everywhere. Please mind that you have to deselect the areas that you didn’t want to mark. | Convenient for selecting big areas of the same colour. |
| Select Area by Colour | Works like "Select Continuous Area". | Convenient for selecting big areas of the same colour. |
| Select Image Edges | For this you click with the cursor at regular intervals and concise places on the edge of the object. The tool draws the selection line automatically around the object. When you’ve closed the line you click into the object and the line becomes a selection. | Only usable when the contrast between object and background is very good and when the edges are very defined. |
| Create and edit Paths | You use the cursor the way you’ve done it at „Select image edges“ to set crosspoints at regular intervals. Between the points appears a line which you have to align individually to the object. Then you click on the menu item "Selection" and there you choose "From path" and the selection appears. | Good for big and medium sized objects. Too many details are difficult to select. |
| Rectangular and elliptical Selction | Those selections are predefined. You can only define the size. | Only recommendable for clear-cut geometrical forms. |
In order to get a truly monochromatic mask one must deactivate smoothing in all selection tools.
When you’ve selected a mask you can colorize it. Paint it with the brush, fill it with the paint bucket or use the command "fill with foreground color" in the menu "Edit".
The areas that you don’t want to colorize in the ColourDesigner have to be filled with black or white.
In the end you have to save the mask with "File > Save as..." into the folder "Images/Masks" adding the ending "_mask.png". Example: "houses_mask.png".