Colour Systems Manager
How can I deposit my own colour list as a system, how can I group colour systems?In this window you manage the colour systems, that is you can add or delete, actiave or deactivate systems or also assemble them into groups.
This window can only be accessed in the full version via the menu in the individual windows.

Create and edit Colour System Groups
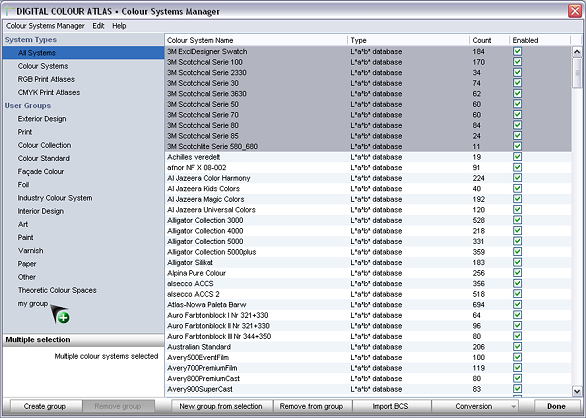
All Systems
The overview “All Systems“ contains all of the original to the software and newly added colour systems. These are sorted into the therein contained folders according to their properties (L*a*b* colour systems, RGB print tables, CMYK print tables).
Creating and removing Groups
Using the buttons “Create groups“ and “Remove groups“ you can add or delete your own groups. The deleting of a group does not lead to the deleting of colour systems. These remain contained in “All Systems“
Change Group Names
By double clicking on any give group you can change the group name.
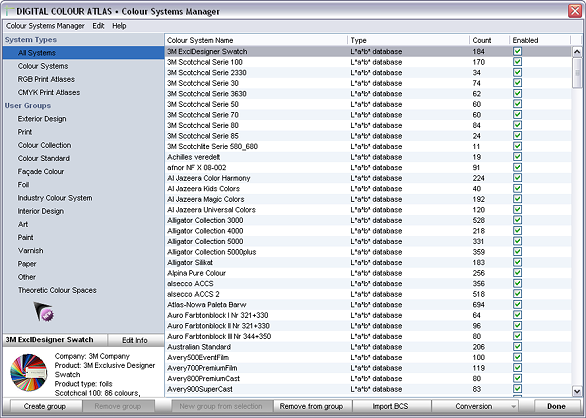
Information about Groups
Add information about a group/a colour system or change the existing information, by marking the desired group/colour system and add text or change text through “Edit Info“.
Assign Colour Systems
In order to assign colour systems to a group you mark them in the overview “All Systems“ (or in a different group) and then drag them into the new group with the mouse.
By using the button “New group from selection“ the marked colour systems will be added to a new, not yet existing group. The group will appear as “new group“ in the list.
If you drag the marked colour systems into the empty area under the existing groups, you will also create a new group “new group“.
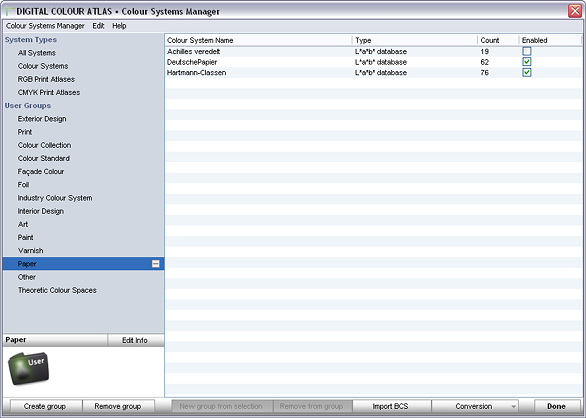
Remove Colour Systems from Groups
By using the button “Remove from group“ the colour systems can be deleted out of a group.
Activate and deactivate Systems/Groups
Activate and deactivate individual systems by setting or removing check marks from the “Activate box“ beind the respective system. In order to activate or deactivate a group, including all of the systems contained therein, mark the desired group. With the marking a “Activation box“ will appear with which you can activate or deactivate all of the systems in the group. (Checkmarks appear/disappear on all systems of the group at the same time). If there are both activated and deactivated systems contained in a group this will be indicated by a horizontal line.
Including further Colour Systems
It is especially practical to be able to integrate your own colour lists as colour systems into the software. These lists are then available for all functions of the software, you can calculate colour comparisons with them, create harmonies, represent them in 3D, and so on.
RGB– and L*a*b-colour lists are supported.
RGB or Lab Colour Values?
Lab colour values are actually the better choice due to the fact that they are not defined by the kind of output media. Instead of that they are independent from the output media. The CIELAB model which is base for that is more consisting with our perception than RGB. In contrast to RGB the lab coordinates are precise also for areas in which our viewing perception has a high sensitivity.
Certainly LAB calour values can only be gained with spectrophotometers. If one is available the measuring conditions have to be in accordance to the ones of our Software (10°, D65). Thirdly experience says that also when consistent conditions for the measuring are secured there are deviations of the LAB-values due to the type of the measuring device, which are expressed in Delta-E-units can reach values from 2 until 3.
The integration of RGB values is in the normal case less problematic and is more in step with actual practice. The files which are used for deriving the RGB data should be according to the sRGB definition as near as possible. The most digital cameras, scanner and monitors nowadays reach a good sRGB reproduction. The values can be extracted from the picture file with a pipette and can be written by hand to a text file.
Brief Instruction
- L*a*b*-measurement values can be gathered from a software, requested from the colour manufacturer, measured with a colour measurement device, or let us measure them for you.
- RGB-values can be gathered from any given file with the Colour atlas-pipette – utilise the clipboard function of the pipette.
- Write the measured values down in a simple text program (Notepad, SimpleText) line by line one below the other in the format.
"Colour name[TAB]L-value[TAB]a-value[TAB]b-value" or
"Colour name[TAB]R-value[TAB]G-value[TAB]B-value". - Save a L*a*b*-file with the ending “.clf“ and an RGB-file with the ending “.usr“, respectively UTF-8-coded... Should the program save the file as a Text-file („.txt“), change the ending again after saving (don’t let the message that you can’t change the file name lead you astray!)
- Pull up the DIGITAL COLOUR ATLAS in the “colour system manager”.
- Drag the file to the list area in groups (right) or complete list (“All Systems“). By using the button “Conversion“ entire folders can also be added. By using the button “Import BCS“ you enable the addition of BCS files.
- The colour inventory is now saved as a BCS-file in the folder “Colour Systems“.
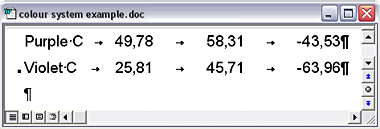
The correct input of the Lab-values in a text document (Special character visible).
Text– and Image Information to the Colour System
Information to the colour system are belonging as TXT and JPEG file to the the subdirectory "Colour Systems/Info".
Attention:
- The topmost row of the textfile has to sound "[english]".
- The image file has to be on hand in the type of a JPG file with 128 x 128 pixel.
Our Measurement Conditions
Measurement Conditions It is best to apply the measurement conditions used when determining our CIELAB colour values. This way, no uncontrollable results will be generated:
- Measurement equipm: Techkon SP 810 Lambda
- Standard light D65
- Standard observer according to CIE 1964
Our Service
Additional colour sets can also be measured by the software manufacturer and prepared for the atlas. We also make existing colour sets available to our users for free.