Easy Matching
How do I create – easily and intuitively – a colour on the monitor?Within Easy Matching there is hidden a uniquely simple to manage tool for the exact colour creation.
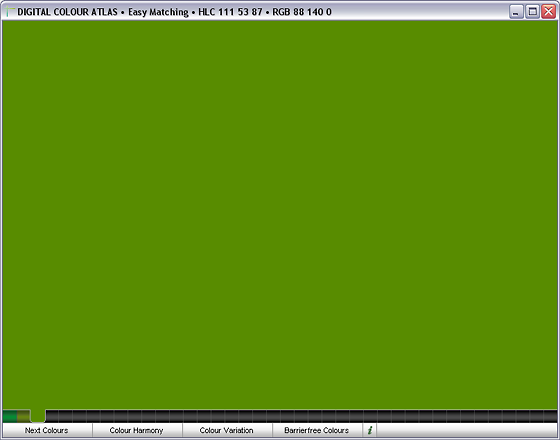
The Easy Matching window
How does One create an exact Monitor Colour without Easy Matching?
Have you ever tried to display a colour example on the screen mostly similar to the original? Make sure that you have a good action of light, clip the colour sample on the monitor screen,... and then?
Idea 1: CMYK-Colour Matching and Conversion in RGB
Employees of the pre-press like to use a CMYK-colour atlas for their reference and thereby determine the suitable CMYK-colour values, e.g. for art print. Many producers of colours (e.g. HKS, Pantone) also deliver optimized CMYKs. Due to the fact that the monitor needs RGB calour values, the CMYK [values] are entered to a CMYK-able software (e.g. Photoshop, Indesign) and converted there to RGB.
This method is to be disapproved completely!
- CMYK is a very limited colour area compared with the monitor. Many colours (e.g. orange) are not able to be specified exactly, although they could be created on the monitor.
- By the double conversion the inaccuracynesses multiply.
- The conversion from CMYK->RGB colours is only insufficient consistent with the conditions of the printed colour atlas.
Idea 2: RGB-Input
RGB values (specified in numbers) can be entered into entry fields within all programmes which are able to work with colours.
The RGB model is defined in a much too technical way in order to be able to be understood intuitively and emotionally. Also the rules of the additional mix of colours, the understanding of colours as lights is difficult to understand for our intuition.
Idea 3: HSB-Colour Matching
Numerous graphics applications allow the entry of colour values in the HSB mode (Hue, saturation, Brightness, or HSL, HSV). Simultaneousely the RGB colour values are displayed.
This method also has disadvantages:
- the preview of the colours is much to small for an exact operation, their size can't be changed.
- the technical and easy to programme HSB colour model doesn't react really in an expectable way on changes. So for example small changes in the pastelscale have an enormous impact, whereas in dark unsaturated colour areas nearly it has no impact. A colour choice on the base of the perception based CIELAB model would be more reasonable.
Idea 4: Solution via Scanner or Photo
You can photograph the colour sample or scan it in, subsequently the RGB-files will be available. How precise the screen display is depends on the hardware and the accuracy of the software settings. The biggest drawback to this process: it takes too long!
Easy Matching
Instead a variation of the colour by HSB this windows supplies the variation of the colour which is based on CIELAB and the variation by the variable HLC (Hue, Lightness,Chroma). This has the effect as a result that changes of the colour are made in a far more floating and more natural way.
Furthermore the easymatching window is sufficiently large and can be scaled in a user-defined way.
Instead by using laborious entries of digits or by scrolling bars a colour is changed as directly as possible by movements of the mouse on the colour area itself.
Easy Matching saves all of the colour tones that you have created during the step-by-step trial process and lists them in the lower taskbar one after the other. This way you can go back to a previously generated colour at any time.
| Input | Function |
|---|---|
| ALT + horizontal move of the mouse | Variation of the „H“ value (base colour tone) |
| Vertical move of the mouse | Variation of the „L“ value (brightness) |
| Horizontal move of the mouse | Variation of the „C“ value (saturation) |
| Drag the colour bar | Move colour bar |
| Mouse click on a colour field in the bar | Colour selection |
| STRG + mouse click on a colour field in the bar + (ALT + ) vertical/horizontal move of the mouse | New variation of the initial colour |
Clipboard-Functions
You can copy the colour values that are set in the Easy Matching Window into the clipboard by using Ctrl+C or Apple+C. In the info-area of the window you can check the values to be copied.